A colorful craft that will get you outside and keep the kids busy! Follow these simple steps to make your very own Rainbow Suncatcher.
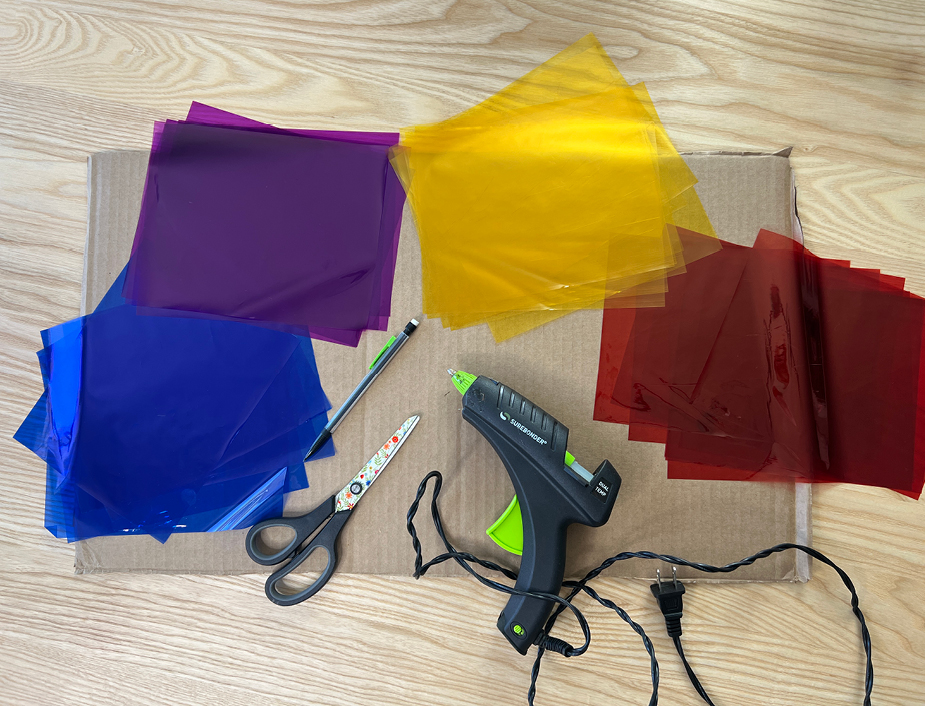
Supplies:
STEP 1:
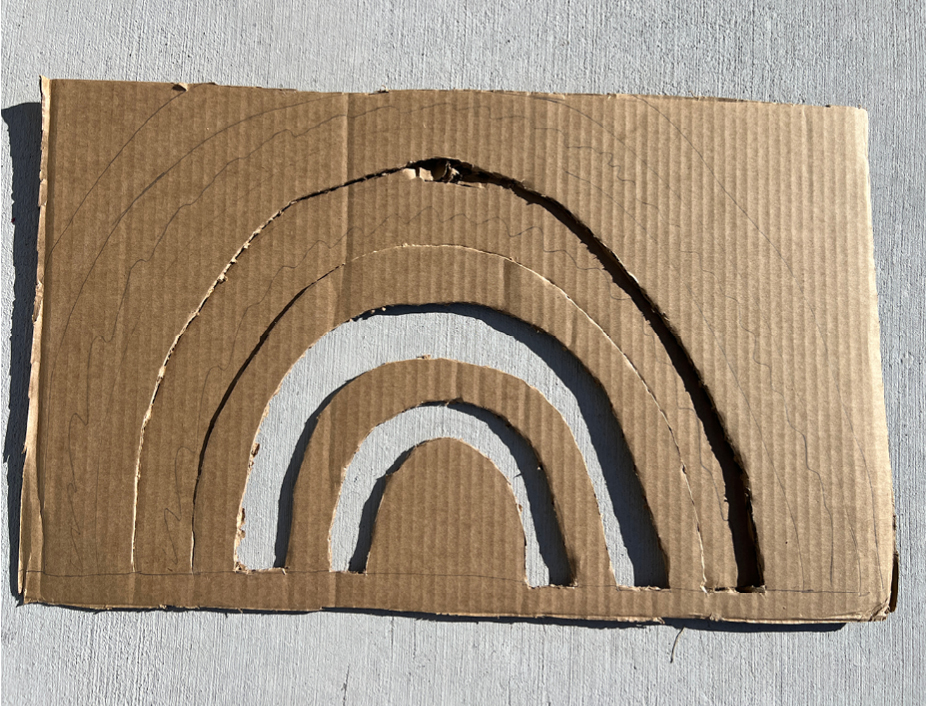
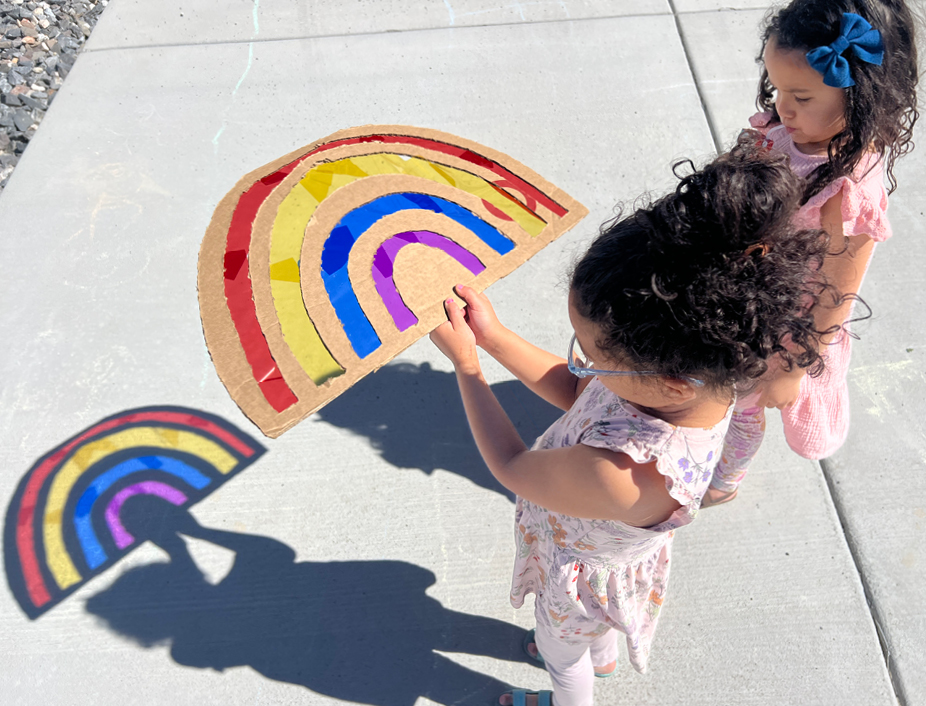
First draw your rainbow. Make each arc blocky and leave some space between each – about ½ an inch to an inch.
Then grab your exacto knife and carefully cut the arcs out.
STEP 2:
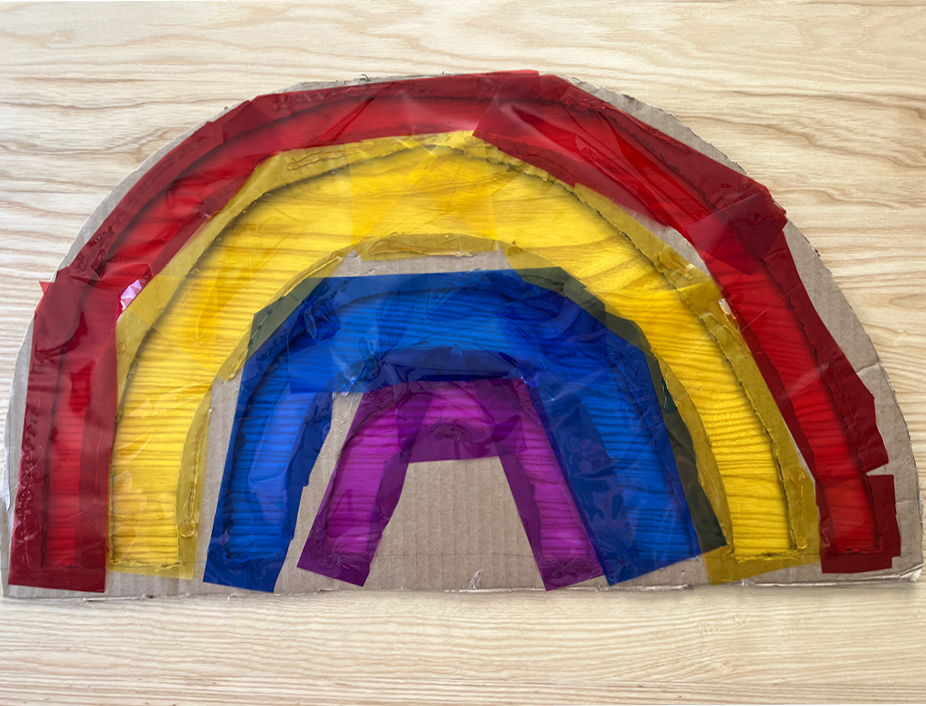
Cut your cellophane paper to fit along each of the arcs. Use a rainbow of colors as this is in fact a rainbow suncatcher!
Next, use your hot glue gun to glue the colorful cellophane paper to the cardboard. A good job for littles is to help you line up the colors in the order you’d like them to appear.
STEP 3:
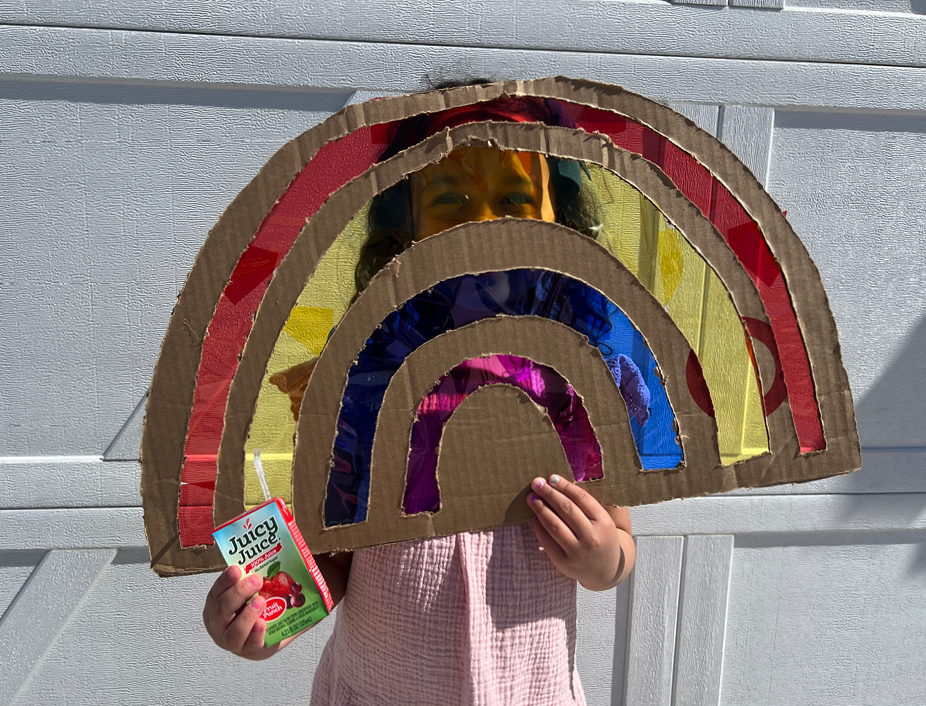
Go play! Take your rainbow suncatcher out into the light and see how cool it looks casting colorful rainbows as many places as you can.
Things to Consider:
Don’t forget to share the fun with us on Instagram @juicyjuiceusa
Fruit sushi? That’s bananas! This banana sushi is a fun treat that’s easy to get little hands involved in helping to make!
Total Time: 15 minutes
Servings: 2-3
2 Bananas
1/2 cup creamy peanut butter
1/2 cup crunchy peanut butter
1/2 cup chopped strawberries
1/2 cup crushed cookies
2 tablespoons of white sprinkles
Know someBUNNY who would love cute and colorful Easter Deviled Eggs? Us too!
Total Time: 1 hour 30 minutes
Servings: 12
One dozen eggs
Jello gelatin mix (in any color you like)
Mayonnaise
Mustard
Salt
Pepper
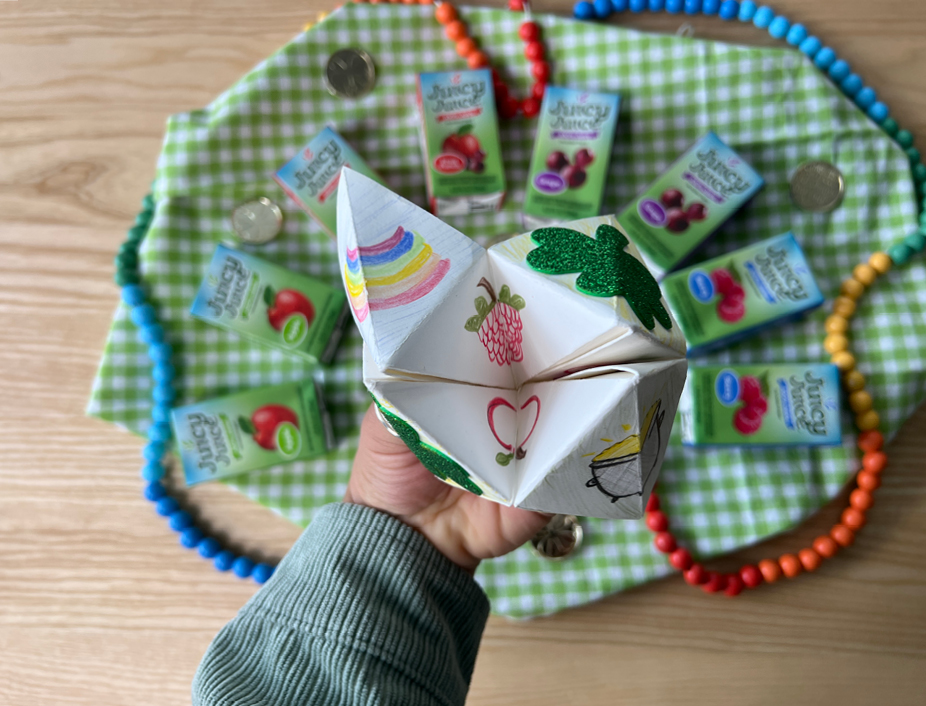
It looks like you have a Juicy Juice Four Leaf Clover Fortune Teller in your future.
If you remember making these fortune tellers as a kid then you know how much fun they were. Recreate that magic with your own littles this St. Patrick’s Day!
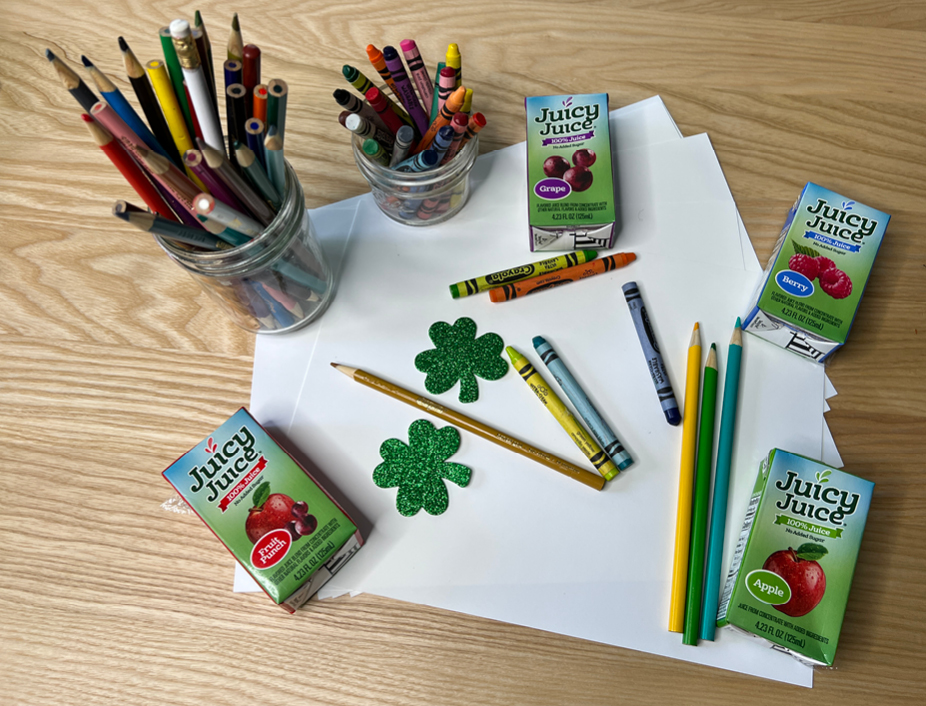
Supplies:
STEP 1:
Trim off the excess of a sheet of 8×11 printer paper, leaving you with a square. Fold the paper in half, point to point. Open it up and repeat with the other two points. Then open it up again.
Now fold each of the corners into the center of the page so all four points are touching in the middle.
Flip the page so all the points you just made are face down. Now fold the corners on this side of the page into the center, so all the points are touching in the middle.
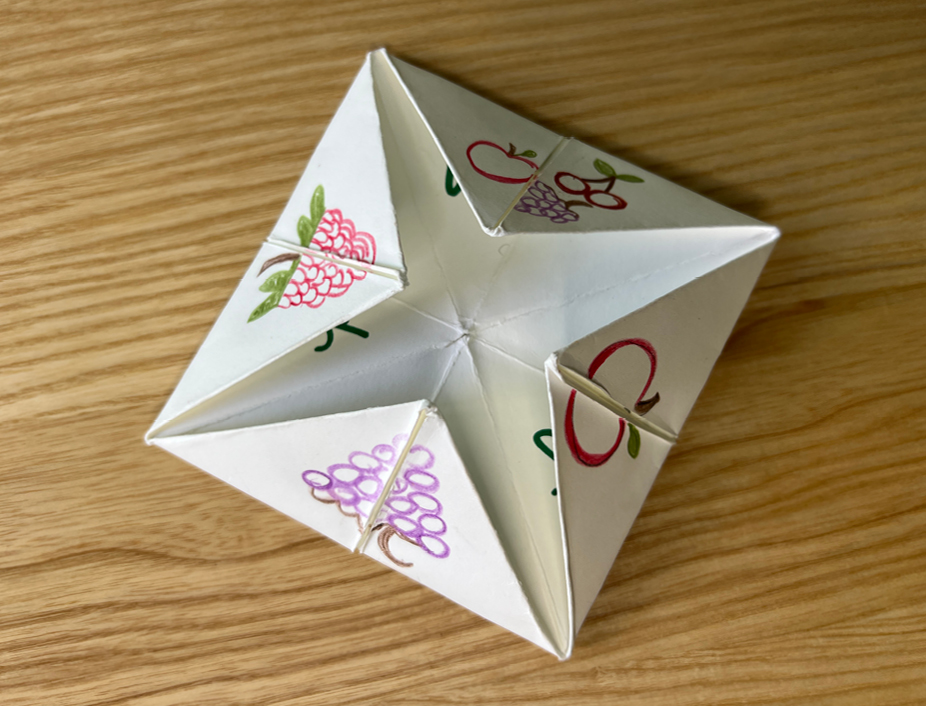
Your paper should look like this:

STEP 2:
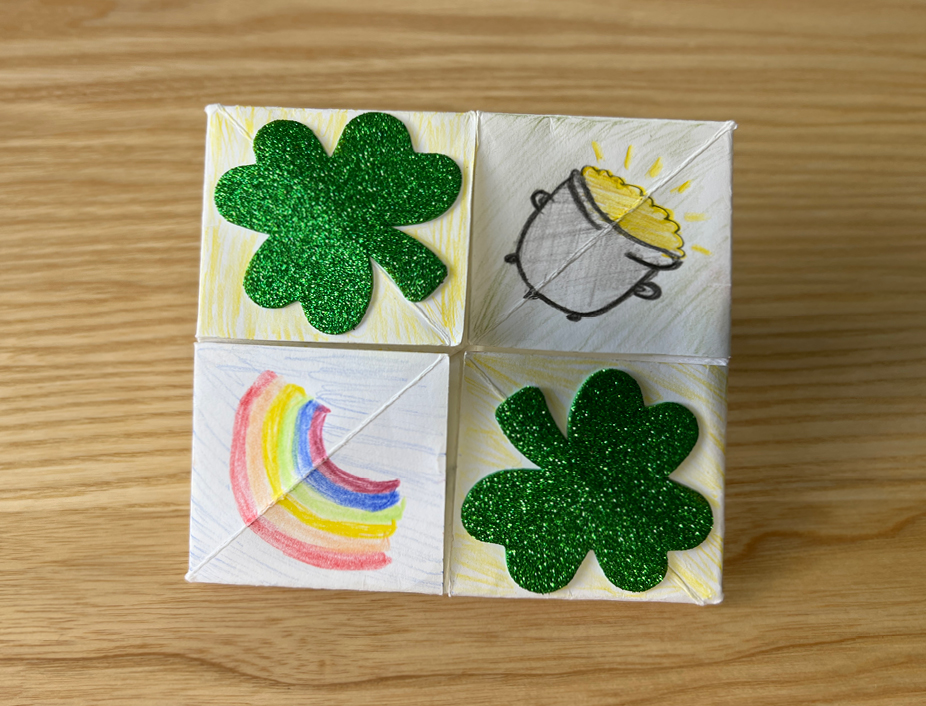
Flip your paper over and add some St. Patrick’s Day themed stickers or drawings, like rainbows, pots of gold, four leaf clovers, horseshoes, etc.
Then flip your paper back to the other side where the flaps lift. On each of the 4 flaps draw your favorite fruits and/or flavors of Juicy Juice! We picked apple, berry, grape and fruit punch! Yum!
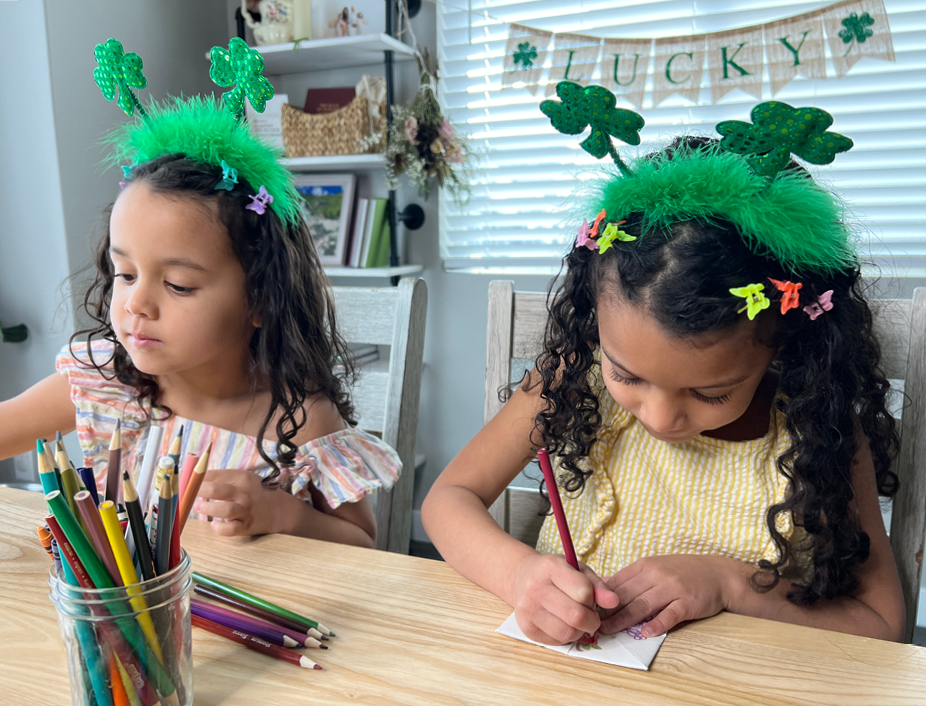
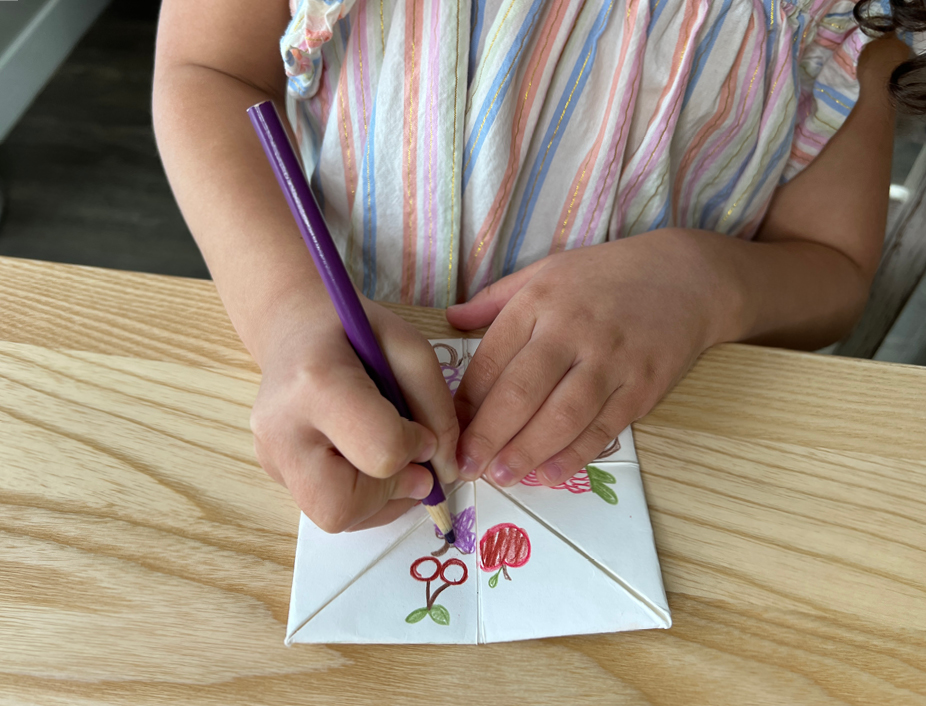
STEP 3:
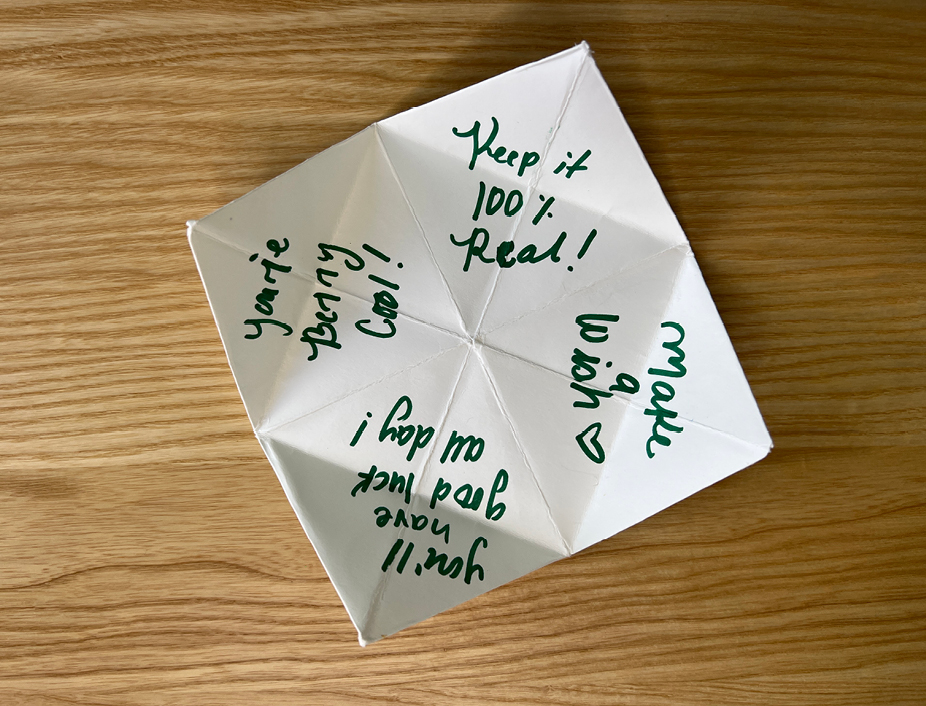
Under each fruit flap you’re going to write 4 different messages. Get creative and help your littles think of some fun fortunes like “make a wish” or “keep it 100% real!”
STEP 4:
Once you finish with your messages it’s time to try your Juicy Juice Four Leaf Clover Fortune Teller out!
We’d love to see your craft after it’s done! Tag us @juicyjuiceusa

If your kids love a treat – game on! This kid-friendly, game-day snack board gives your kids a yummy balance of “treat” foods alongside other important foods like fruits and veggies! This will help to encourage them to try both.
Total Time: Prep: 10 minutes Prepare: 10 minutes
Servings: 4-6

Mini pizzas
Everything bagel chickpeas
Football-shaped brownie bites
A bunch of grapes
Strawberries
Celery
Cucumbers
Mini peppers
Ranch dip
Popcorn
Soft pretzels
Muddy buddies (Chex mix)

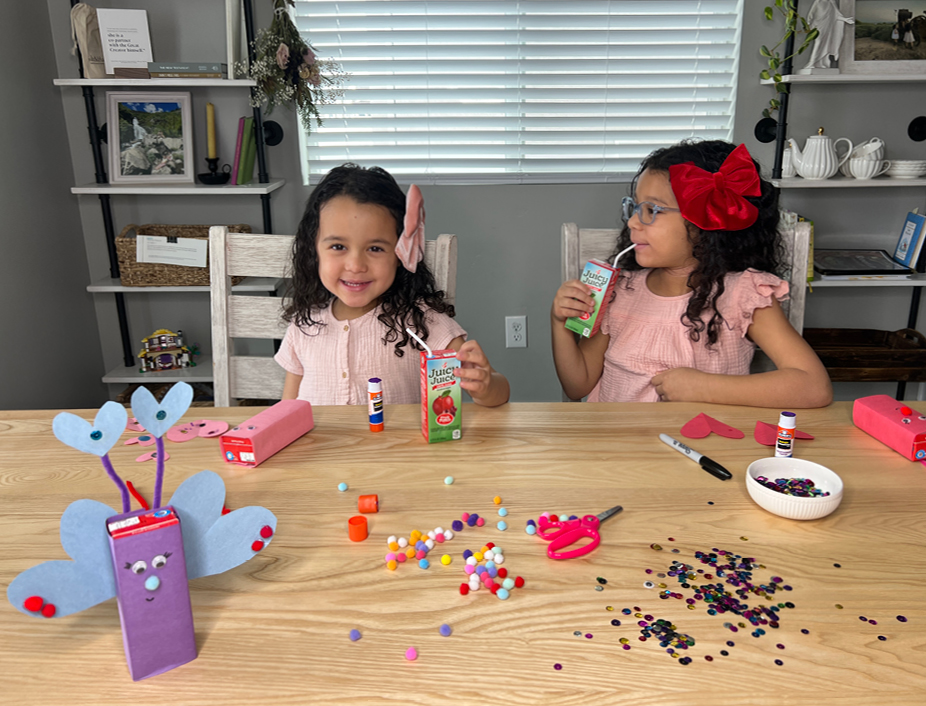
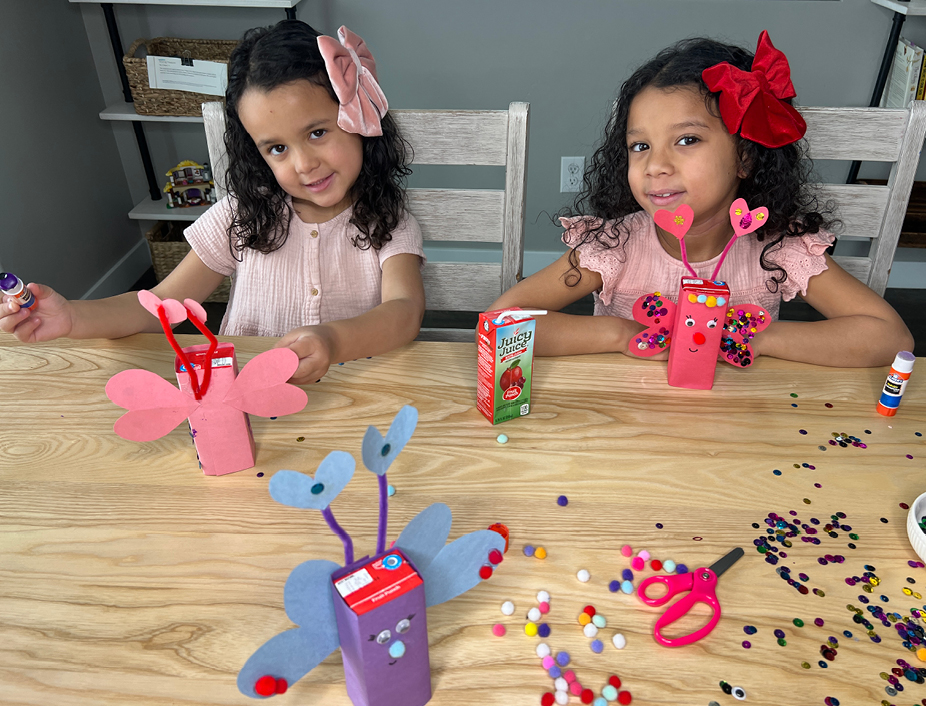
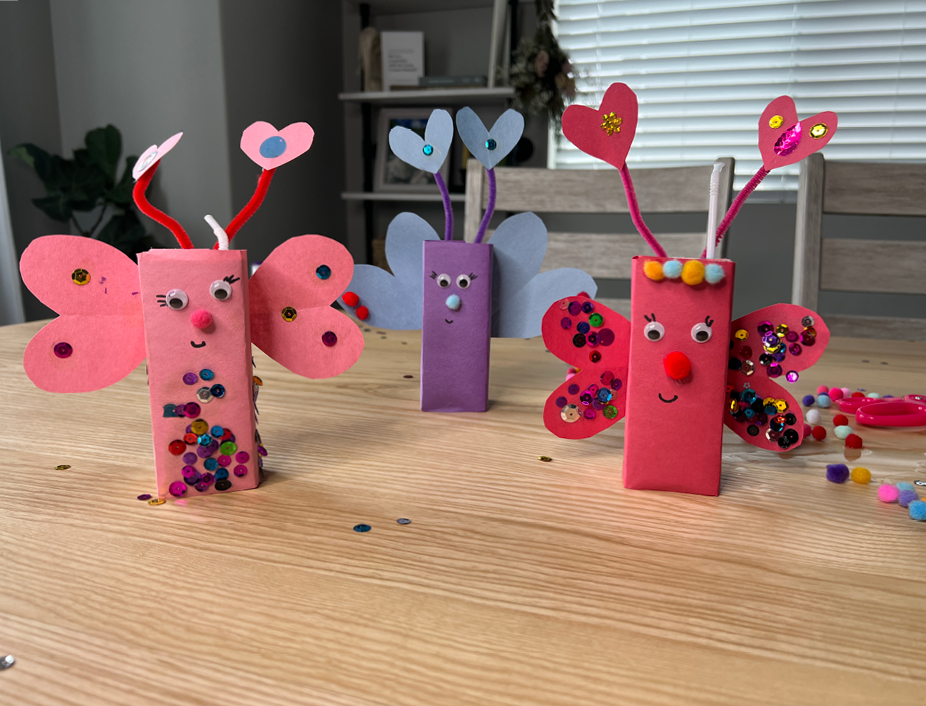
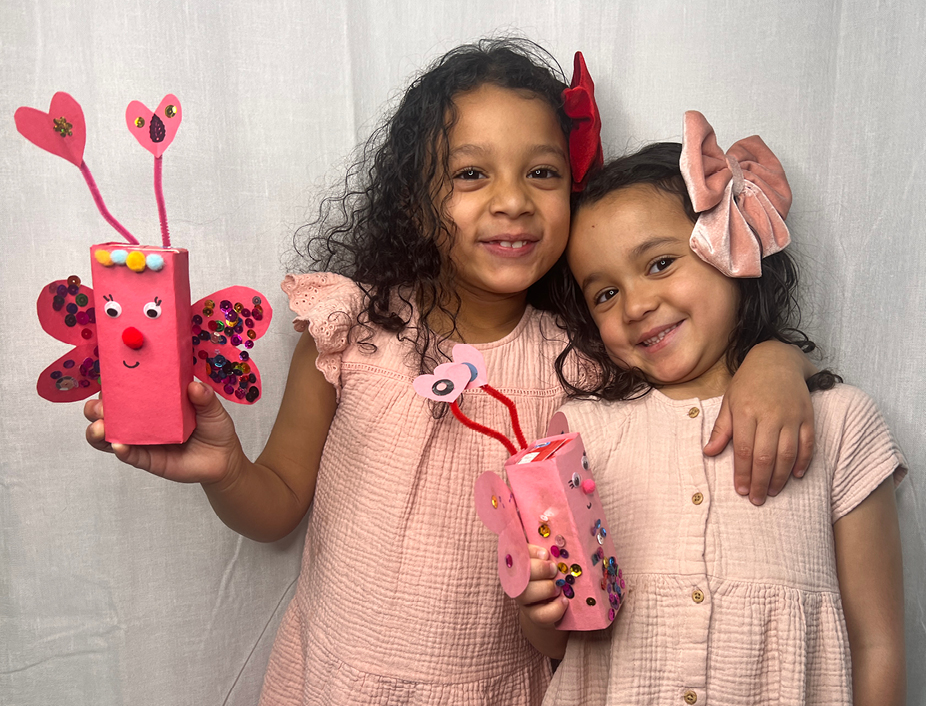
Fall in love with the cutest Valentine’s Day craft. Our Juicy Juice Love Bugs are perfect for you and your little to try together. They also make a great valentine for close friends or classmates!
Supplies:
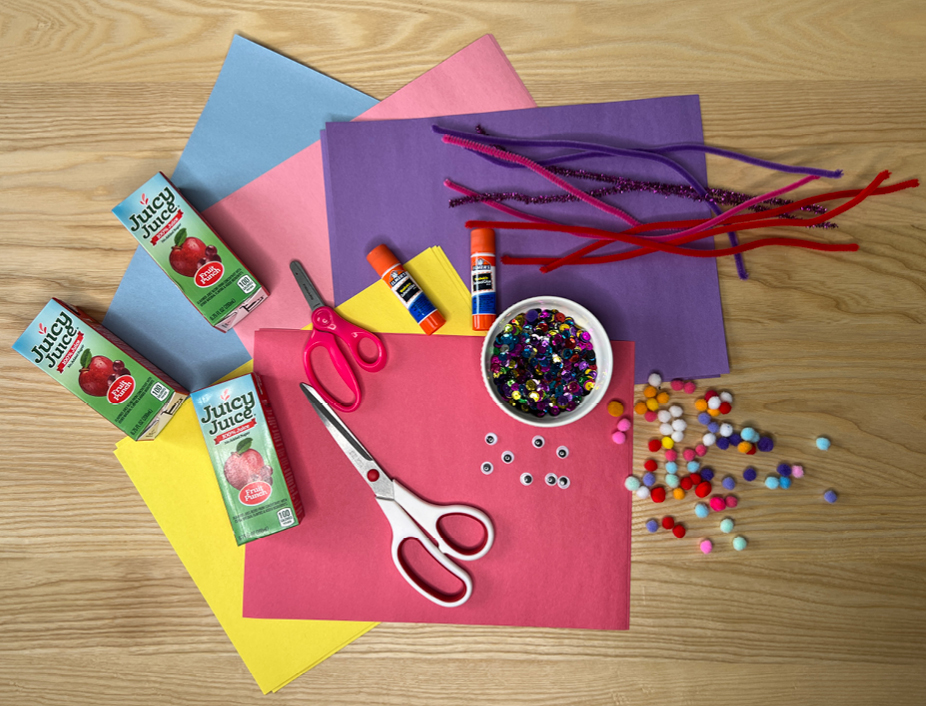
STEP 1:
Adults, this step requires some cutting so we’re going to need you!
– Cut a piece of construction paper to fit around the length and width of your juice box.
– Cut your pipe cleaner a few inches long – the length you’d want for the antennae.
– Cut out hearts in various sizes and colors for the wings and antennae toppers.
Repeat this step for however many Love Bug Juice Boxes you’re making.

STEP 2:
Wrap your juice box with the construction paper and glue the ends together. While that dries, we’re going to do the antennae and wings.
We recommend gluing on the antennea toppers to the pipe cleaner first and letting that dry separately. Then attach your antennae and wings to your Love Bug before decorating.
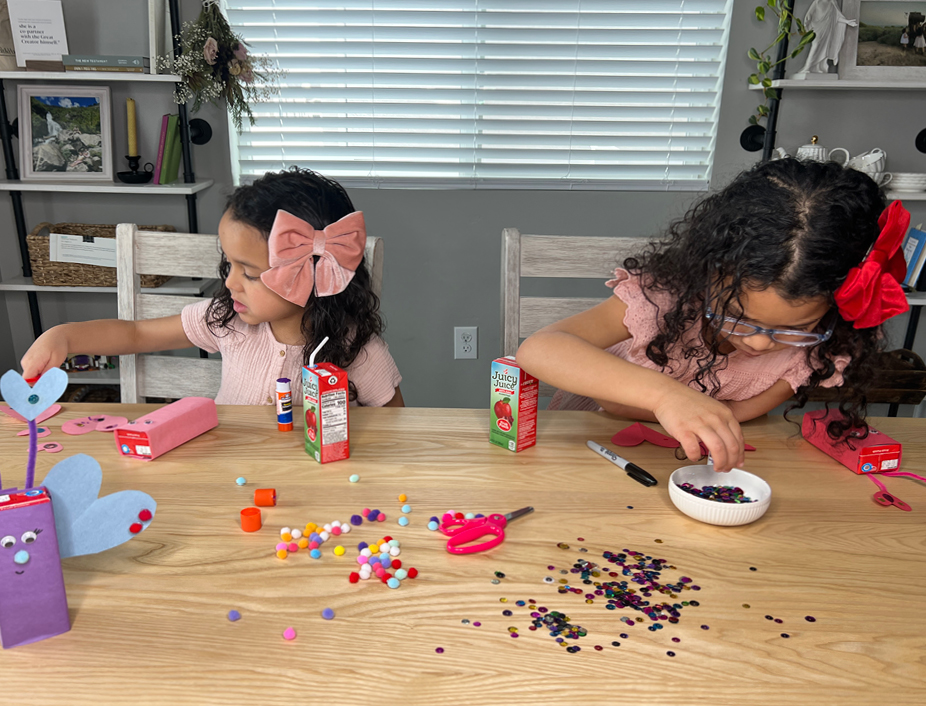
STEP 3:
Once the antennae and wings are glued on securely, lay your Love Bug down flat and get creative with eyes, nose and any other flair you like!
STEP 4:
If you’re gifting these as valentines, write your message on the back of your bug. Or if you made your Love Bugs just for yourself, you can enjoy your Juicy Juice 100% juice now!
Breakfast characters that are so cute you almost won’t want to eat them! This doggie pairs deliciously with any flavor of Juicy Juice 100% Juice! You can find this recipe and so many more on De Waflebakkers website.
Total Time: 15 min
Servings: 1
3 De Wafelbakkers Buttermilk Pancakes
2 De Wafelbakkers Mini Buttermilk Pancakes
1 slice of bacon
1 blueberry
2 chocolate chips
This festive Frozen Yogurt Bark is a great holiday treat for kids and adults too! Plus, it pairs perfectly with Juicy Juice 100% Juice with no added sugar or high fructose corn syrup.
Total Time: Active Prep: 15 min
Freeze: 3 hours
Servings: 5
Baking sheet (11×17)
2 lb container of vanilla yogurt
3 cups of fresh fruit (1.5 cups of strawberries and 1.5 cups of kiwi)
Sprinkles (optional)
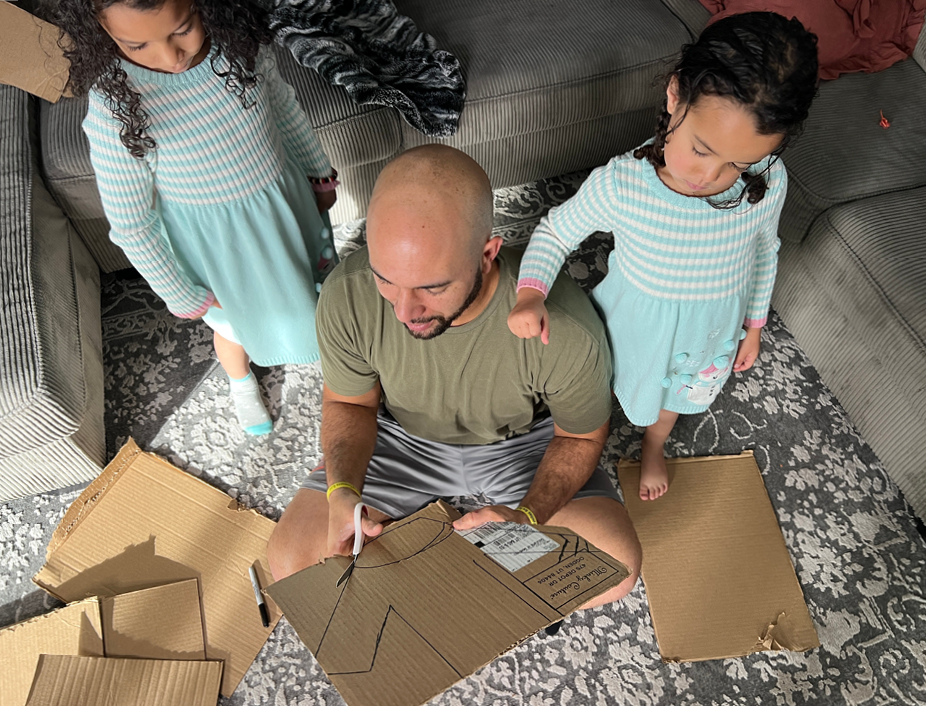
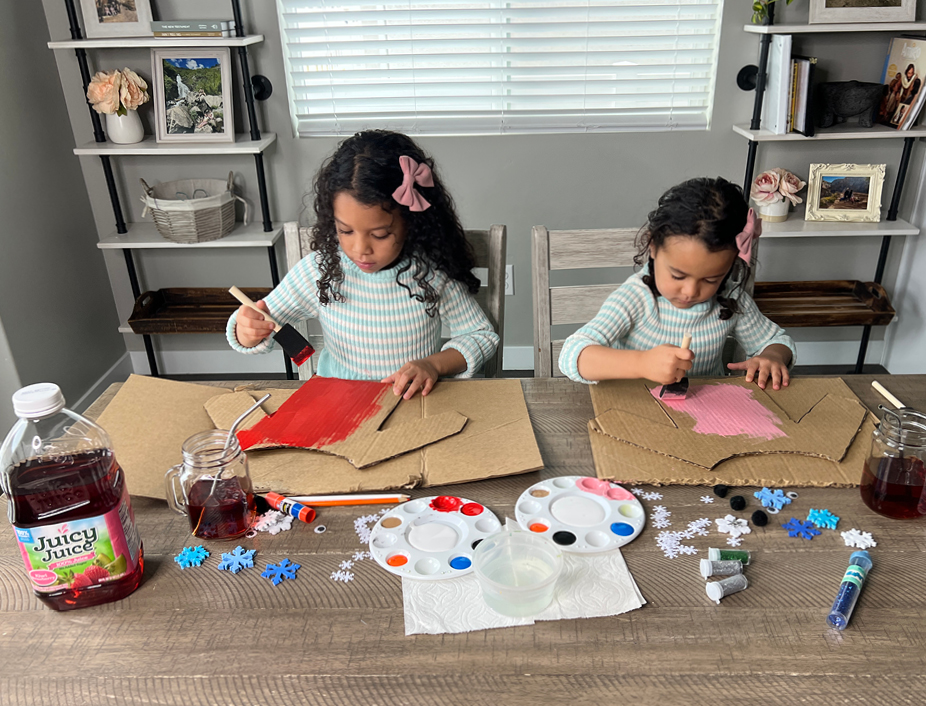
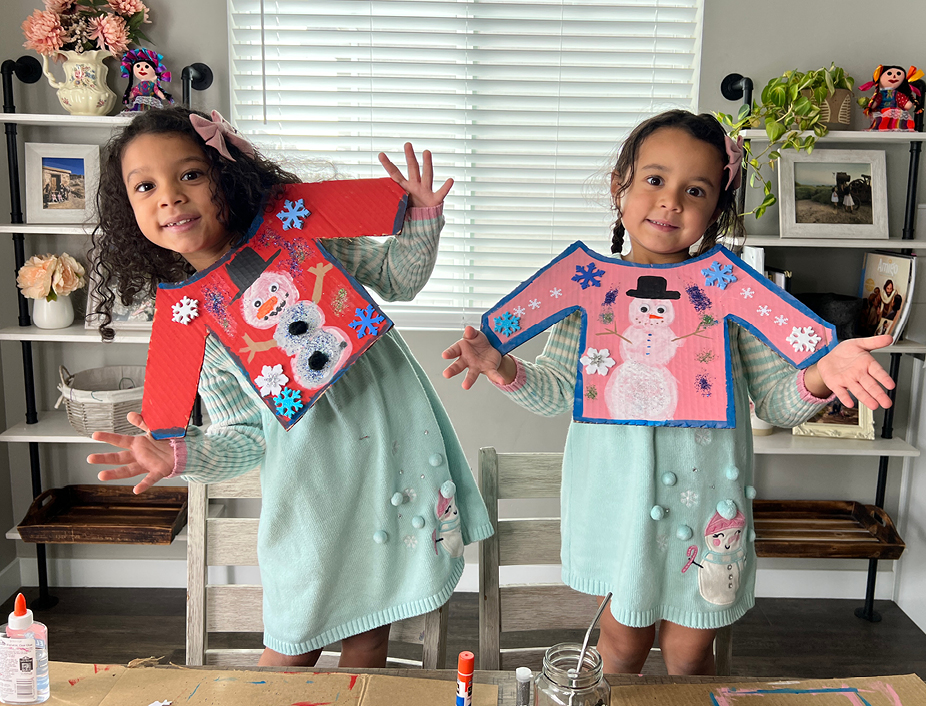
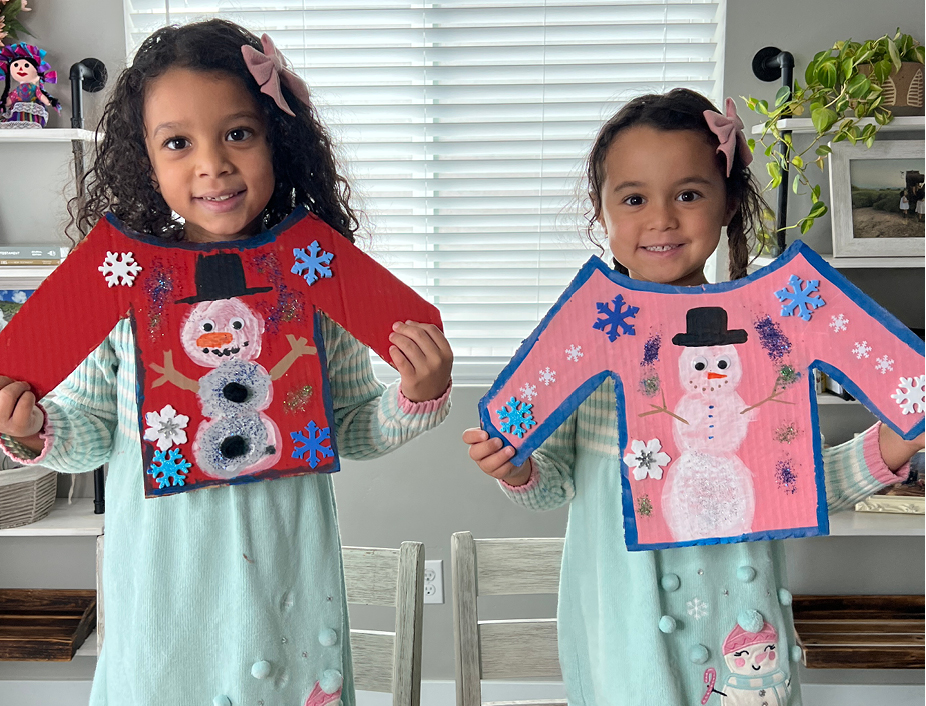
Fun is one size fits all. Don’t throw away your empty boxes! Make your kids happy this holiday and upcycle them into a festive sweater with our cute Holiday Sweater Activity.
Supplies:

STEP 1:
Draw and cut out your sweater shape from a cardboard box.
STEP 2:
Break out the Juicy Juice and throw on some holiday music! It’s time to deck your sweater with paint and glitter (fa la la la la la la la 😉 )! Paint your sweater whatever color you want and get creative with the look. In this example, we add snowmen to our sweaters!
STEP 3:
If you’d like to create this design – use your paint to add a snowman down the front middle of the sweater. Paint your snowman and let him dry, then give him a hat, eyes, a nose, hmm lets see what else? Maybe some buttons, arms and even shoes!

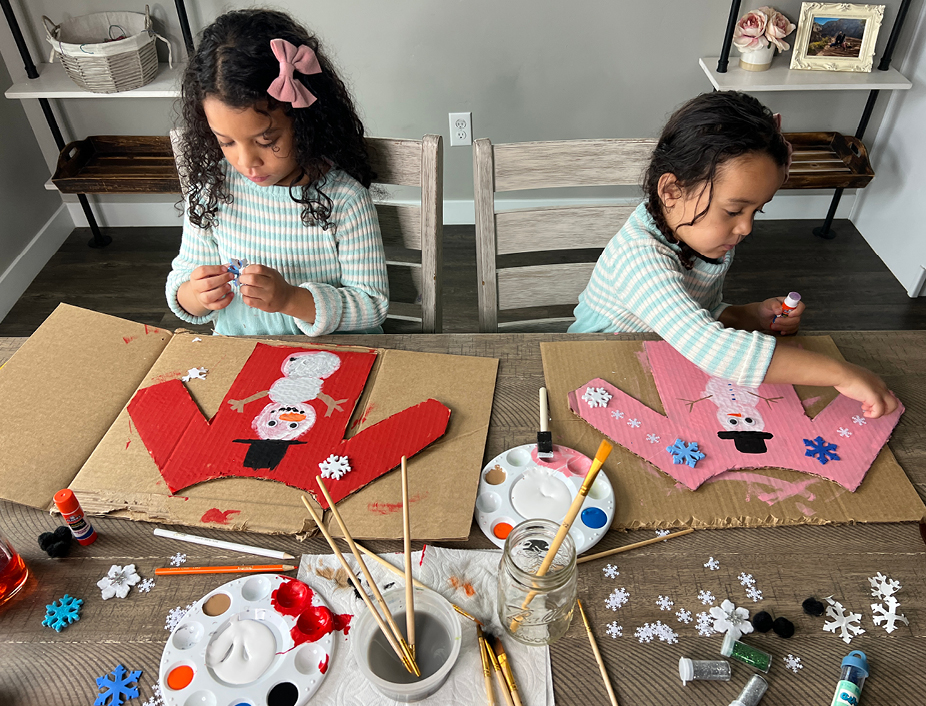
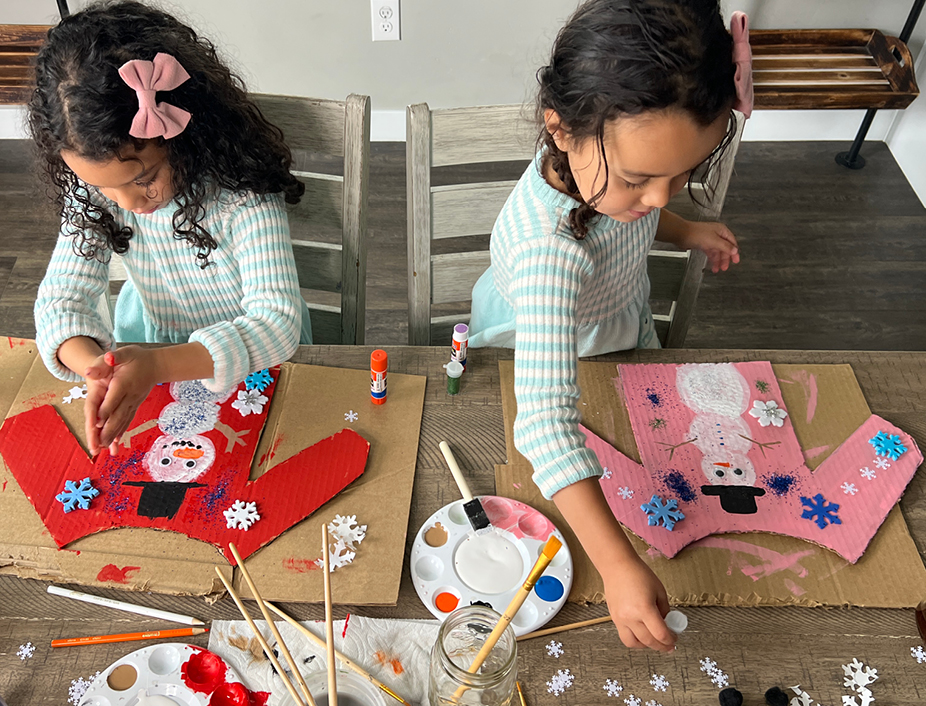
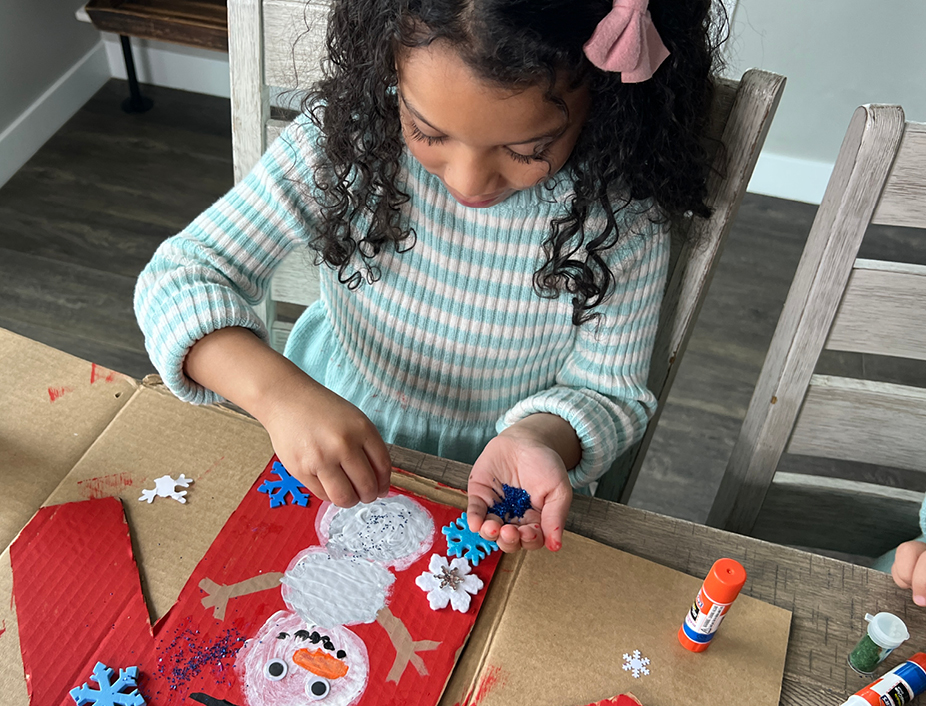
STEP 4:
Add your wintery decorations on and around the snowman to make your sweater even more festive! Then set aside to dry.
STEP 5:
Once your holiday sweater is dry, decide whether to hang it as a work of art or have some fun with it first! Wear your sweater on a pretend holiday adventure. Hold it up to your stuffies or dolls and put on a festive fashion show. Whatever you do, have fun!
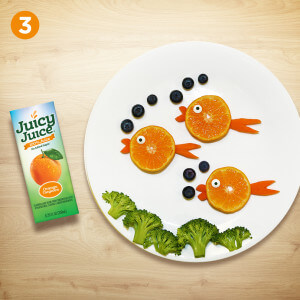
Fish out this recipe for a great after-school snack for the little ones. Please even the pickiest of eaters when you present them with this fruity school of fish. Sneak in the nutrients they need with the high content of vitamins E and C in these Juicy Tangerine Puffer Fish.
Step 1: Gather your materials. You will need broccoli, blueberries, tangerines, baby carrots and edible eyes.
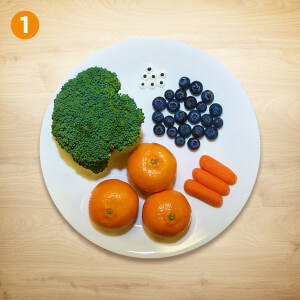
Step 2: Cut the tangerines and baby carrots into slices. The baby carrots should be sliced vertically and horizontally. Once the baby carrots are sliced, carve them into shapes to create the mouths and fins for the fish.
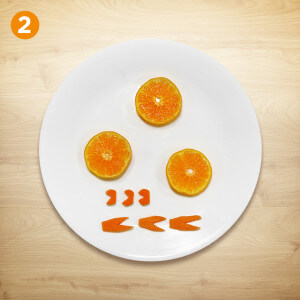
Step 3: Now it’s time to create the plate. Place the orange slices in a triangle formation and then begin to build the fish around each one. Cut the broccoli into small pieces and place them at the bottom of the plate. Then place the blueberries so that they look like bubbles floating up from the mouths of the fish. Present this snack to your children to put smiles on their faces!